Task walk-through
Learn how to efficiently manage your tasks with our comprehensive guide. This walk-through will take you step-by-step through creating, assigning, and tracking tasks to ensure your projects stay on track and deadlines are met. Discover tips and best practices to make the most out of Agencymanager’s task management features.
Task overview, list vs gantt chart
List overview
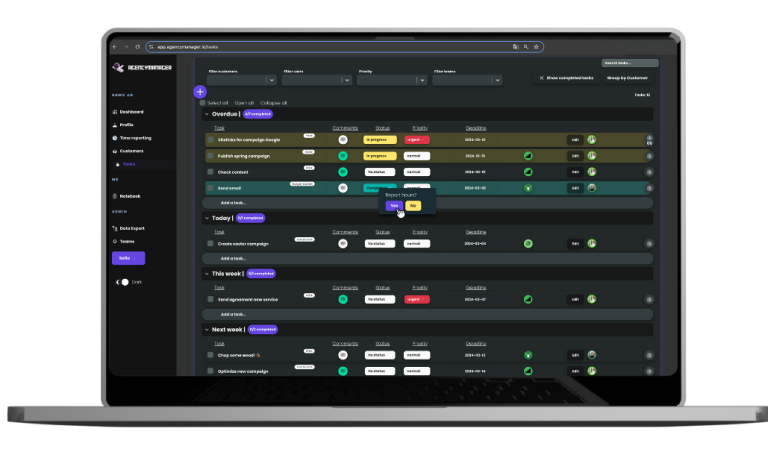
The “List Overview” section provides a comprehensive snapshot of all your tasks, organized for easy access and management. Quickly view deadlines, priorities, and status to ensure your team stays on track and meets goals efficiently.
List filter

You can filter your tasks by customers, users, priority and teams. Group by customers or date.
Customer: Choose what customer you want to look at in the task overview.
Users: Choose what user or employee you want to look at in the list view.
Priority: Choose if you only want to look at the tasks with high or urgeny priority to finish these tasks first.
Teams: If your agency works in teams and you’re a part of more than one team, you can filter on the team you want to see the tasks for.
Completed tasks: Choose if you’d like to see completed task in the list view or not. If you’re working with ticking off your tasks the completed once might be in your way.
Group by customer or group by date: Choose the way you want your list to be grouped. Eather group by your customers or by date to see the tasks for today.
Clear filters: If you want to remove your filters that you have choosen you click on the “Clear filters” text in the upper right corner.
Search tasks: If you want to search for a specific task you can do so in the upper right corner.
Task features explaind from left to right

⬜️: Click on the box to make some quick changes. You can delete the task, change the deadline, change status or select the priority.
Arrow:Click the arrow to add subtasks under your main task, making it easier to manage and work with.
Task: This is your “title of the task”, and the circle above indicates the company to which the task is assigned.
Comments: Feel free to leave multiple comments to document progress and address any issues. The comments feature allows for ongoing communication and feedback on tasks.
✅: Click on this icon to complete a task. You will be asked if you want to report hourse worked on the task, choose yes if you want to and no if it’s not needed.
Status: Keep track of task progress by updating the status accordingly. Choose ‘No Status’ for tasks that haven’t been started yet. Select ‘In Progress’ for tasks that are currently being worked on. Mark tasks as ‘Completed’ once all work on them is finished.
Priority: Assign the appropriate priority level to ensure tasks are addressed in the correct order. You can set the task priority to ‘Low,’ ‘Normal,’ ‘High,’ or ‘Urgent’ to indicate its importance.
Deadline: Select the day the task needs to be completed.
Teams: Here you can see which team is responsible for the task. It is indicated by the team icon, and if you hover over it, the team’s name will be displayed.
Edit: Click here if you need to edit anything in the task.
Assigned to: You will see the avatar of the person/persons responsible for the task nest to the edit-button.
🕓: Click here to start the timer for one specific task. You can then report hours or reset the time. Just click on the clock to pause and start the timer again.
Ways to add a new task
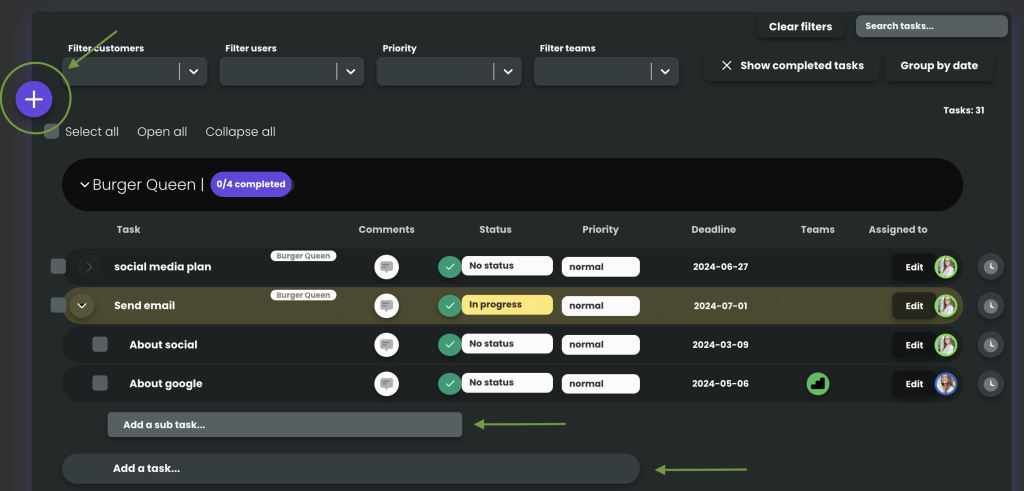
You can click on the ⊕ icon in the upper left corner to add a new task or write the title of the task under the list where it says “Add a task…”. If you want to add a new subtask you click in the ↓ on the left of the task title and then write in your title of the sub task where it says “Add a sub task…”.
Gant Chartt overview
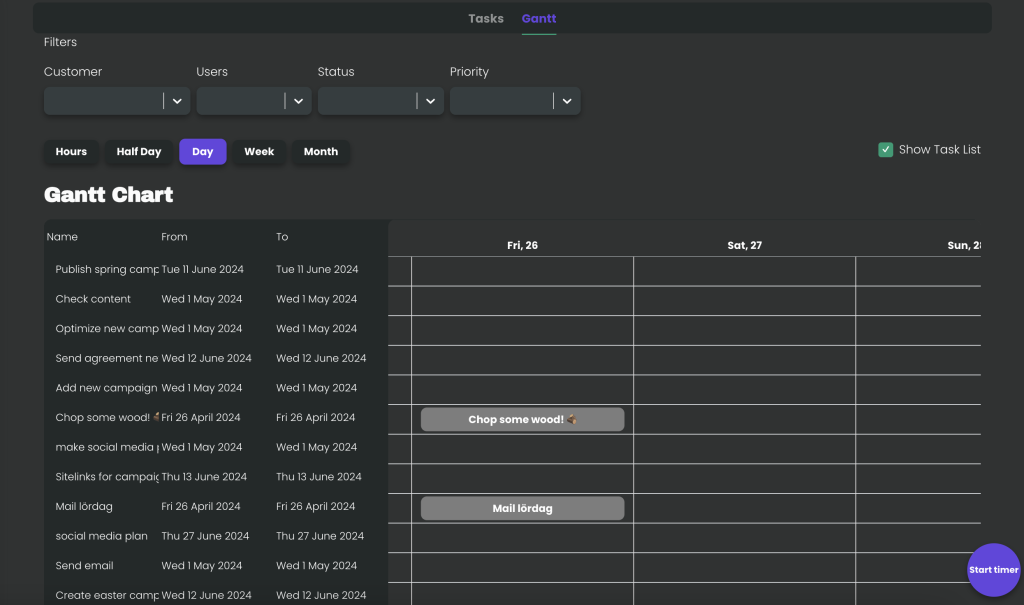
A Gantt chart provides a visual timeline of your project, allowing you to see the start and end dates of tasks, their duration, and how they overlap. This overview helps in tracking progress, identifying dependencies, and ensuring timely completion of the project. Each bar represents a task, with its length corresponding to the task’s duration. By using the Gantt chart, you can easily manage and adjust schedules, allocate resources effectively, and maintain a clear picture of the project’s status.
Gant Chartt filter
Customer: Choose if you only want to look at the task-schedule for one specific customer.
Users: Choose what user or employee you want to look at in the schedule.
Status: Choose if you only want to look at tasks in your schedule with a specific status, like tasks in progress or not started.
Priority: Choose what priority your tasks in the gant chartt should have.
Gant Chartt time-structure: Choose between hours, half day, day, week and month to get the overview that suits you the best.
Show task list ✅: Choose if you want to see the task list on the left or not.
Manage tasks in the gant chartt view
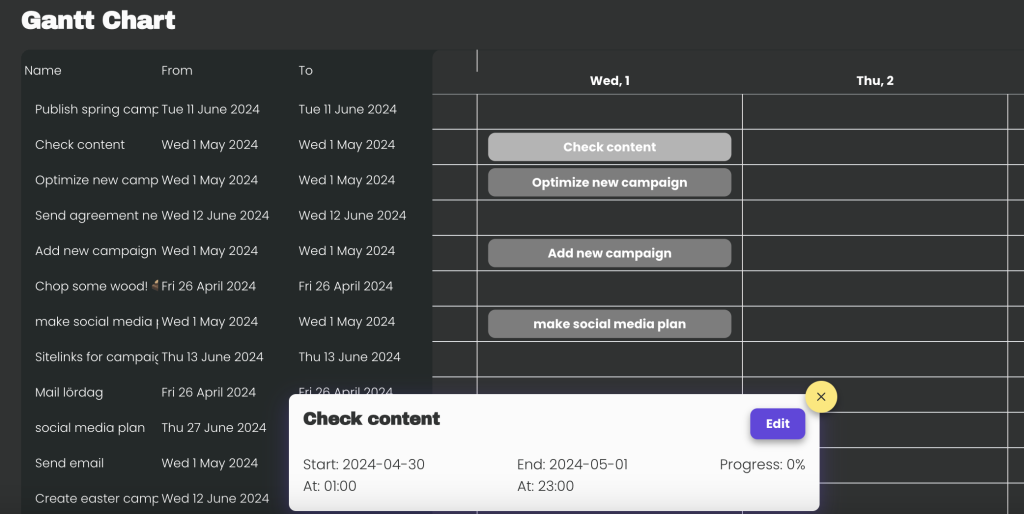
Click on a task to see more information about it. When you click you will see start time, deadline, progress. You can also choose to edit the task. You can also drag the task in the chart to change day or deadline.
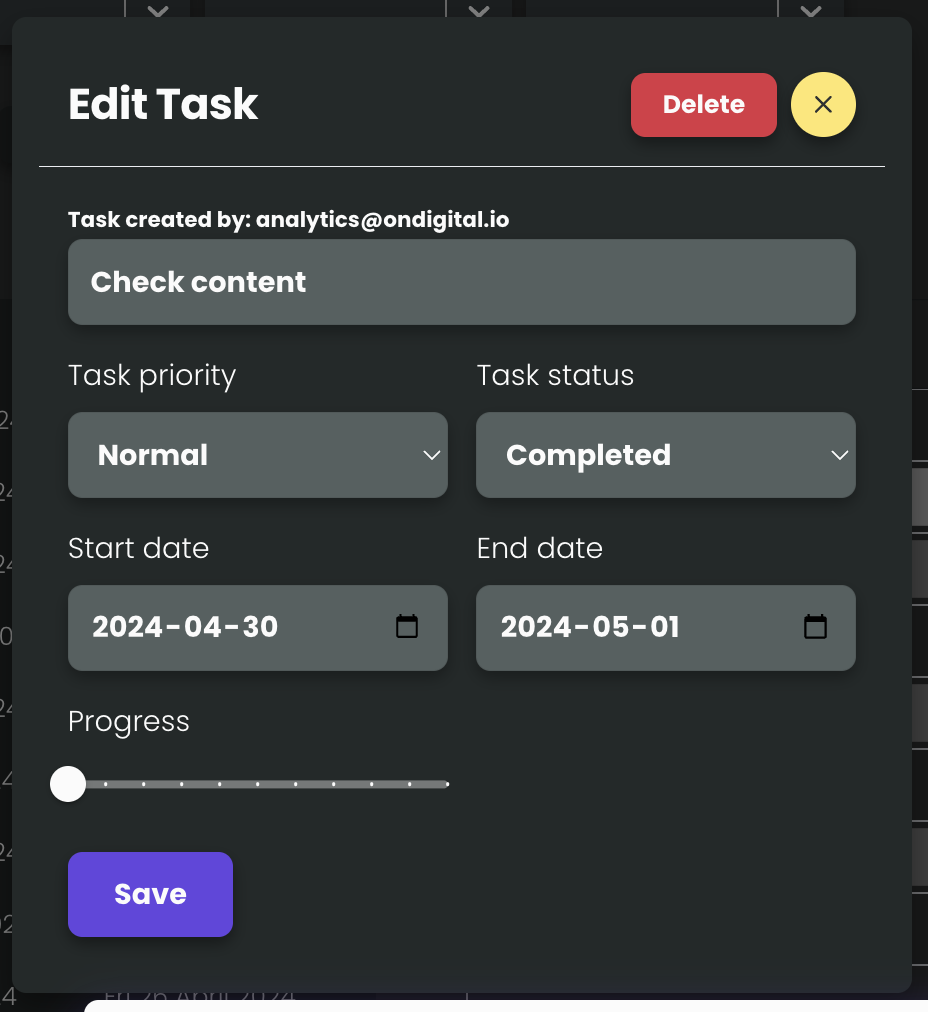
You can edit a task in the gant chartt. You cna edit the title, priority, status, start date and end date and progress. If the task is no longer current you can delete it here as well.

